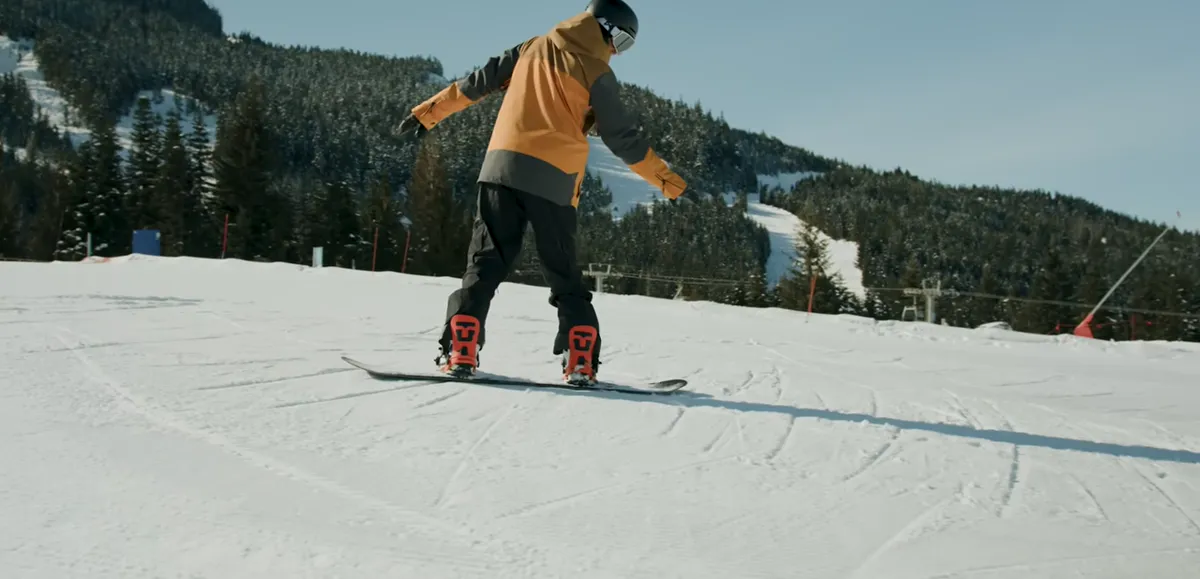
How to snowboard: your first day starts here
How to Snowboard: Complete Beginner’s Guide (With Size Chart)
You’re going snowboarding. Maybe it’s next weekend. Maybe it’s in two weeks and you’ve been spiraling through YouTube videos wondering why everyone makes it look so easy.
Here’s what those videos won’t tell you: every skill in snowboarding is learnable. The fear, the confusion about sizing, the mystery of the chairlift — all of it has a clear answer. This guide covers everything in the order you actually need it: what board size to get, how to set your stance, how to stop without face-planting, how to turn, and how to survive the chairlift.
Let’s go.
What Size Snowboard Do I Need? (Snowboard Size Chart)
Before you touch snow, you need the right board length. Get this wrong and the rest of the day is harder than it should be.
Quick rule of thumb: Stand a board upright — it should reach somewhere between your chin and nose. But this chin-to-nose rule is just a starting point. Your weight matters more than your height for picking board length.
Snowboard Size Chart by Height and Weight
| Rider Height | Rider Weight | Recommended Board Length |
|---|---|---|
| 4’10” (147 cm) | Under 100 lb (45 kg) | 128–136 cm |
| 4’10″–5’0″ (147–152 cm) | 100–120 lb (45–54 kg) | 133–141 cm |
| 5’0″–5’2″ (152–157 cm) | 110–130 lb (50–59 kg) | 139–147 cm |
| 5’2″–5’4″ (157–162 cm) | 120–150 lb (54–68 kg) | 144–152 cm |
| 5’4″–5’6″ (162–167 cm) | 130–160 lb (59–73 kg) | 149–157 cm |
| 5’6″–5’8″ (167–173 cm) | 150–180 lb (68–82 kg) | 154–162 cm |
| 5’8″–5’10” (173–178 cm) | 160–200 lb (73–91 kg) | 157–165 cm |
| 5’10″–6’0″ (178–183 cm) | 180–220 lb (82–100 kg) | 160–168 cm |
| 6’0″–6’2″ (183–188 cm) | 200–240 lb (91–109 kg) | 163–172 cm |
| 6’2″+ (188 cm+) | 220 lb+ (100 kg+) | 166–176 cm |
When weight and height give you different answers: Go with weight. A lighter rider on a longer board has much less control. A heavier rider on a shorter board will feel like the board is fighting back.
Ride style adjustments:
– Beginner: Choose the shorter end of your range — it’s easier to control
– Park / freestyle: Go 2–3 cm shorter than mid-range
– All-mountain: Stay at mid-range
– Powder / freeride: Go 2–4 cm longer than mid-range
Snowboard Width Chart (Don’t Let Your Toes Drag)
Board width is just as important as length for beginners — and almost nobody talks about it. If the board is too narrow for your boots, your toes or heels will hang over the edge and catch in the snow mid-turn (called toe drag or heel drag). This will send you over the front of the board faster than anything else.
| Boot Size (US Men’s) | Recommended Board Width |
|---|---|
| 7–8 | Regular (up to 250 mm waist) |
| 8.5–10 | Regular or Mid-Wide (250–260 mm) |
| 10.5–11.5 | Mid-Wide (255–265 mm) |
| 12+ | Wide (260 mm+) |
For women’s sizing: Women’s boots typically run 1–1.5 sizes smaller in the US system. Use men’s boot size equivalents in the chart above.
Kids’ Snowboard Size Chart
| Child Height | Child Weight | Board Length |
|---|---|---|
| 3’6″–3’10” (107–117 cm) | Under 50 lb (23 kg) | 90–100 cm |
| 3’10″–4’2″ (117–127 cm) | 50–65 lb (23–29 kg) | 100–110 cm |
| 4’2″–4’6″ (127–137 cm) | 65–80 lb (29–36 kg) | 110–120 cm |
| 4’6″–4’10” (137–147 cm) | 80–100 lb (36–45 kg) | 120–130 cm |
| 4’10″–5’0″ (147–152 cm) | 100–120 lb (45–54 kg) | 128–138 cm |
Step 1: Choose Your Stance — Are You Regular or Goofy?
Your stance tells you which foot goes forward on the board.
- Regular: Left foot forward (most common)
- Goofy: Right foot forward
The push test: Have someone push you gently from behind — whichever foot you put out to catch yourself is likely your front foot.
The slide test: Take a run-up in socks on a smooth floor and slide. The foot that goes forward naturally is probably your lead foot.
Already skate, surf, or wakeboard? Your snowboard stance usually matches. Exception: some people find their surf stance differs from their snow preference — try both.
Don’t overthink this. Your first-day goal is to stay upright, not to discover your true cosmic stance. You can always switch later.
Stance width: For most beginners, shoulder-width apart (roughly 20–24 inches) works well. Your rental shop or instructor will set this up for you.
Binding angles: Most beginners do well with something like +15/+0 (front binding 15° angled toward the nose, back binding straight). Your rental setup will already be configured — just make sure it doesn’t feel awkward.
Step 2: Strap In and Get Comfortable on the Snow
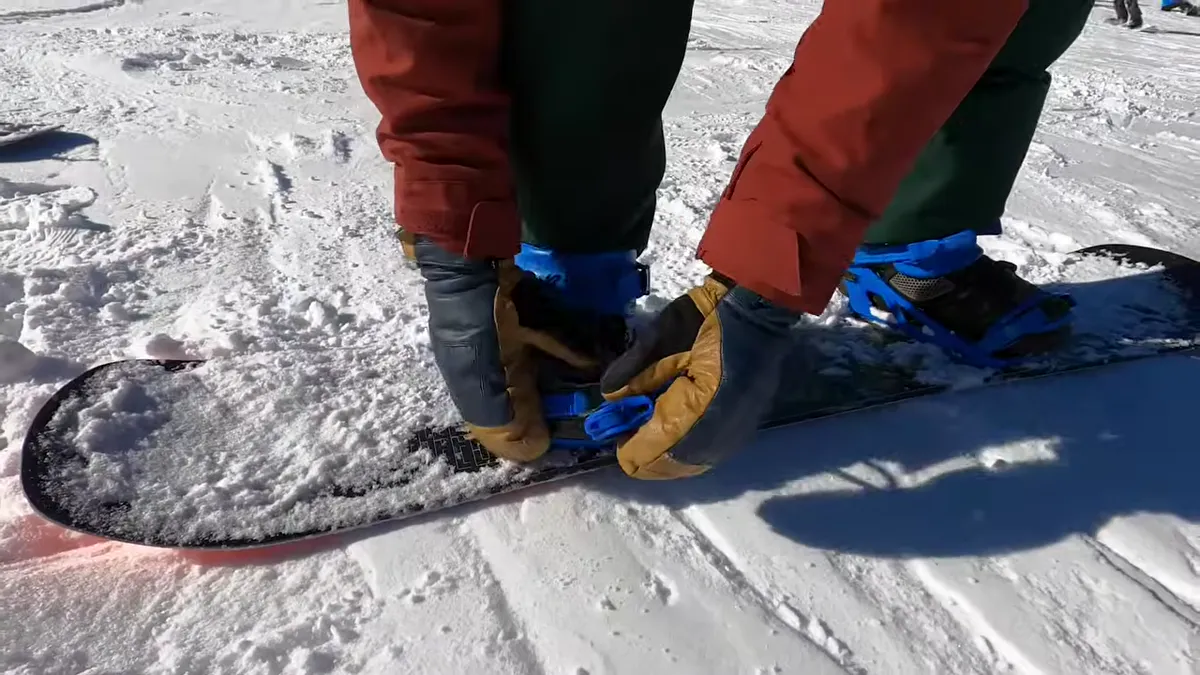
Before you try to move, just stand on the board with both bindings strapped and get used to the weight and feel.
Find a very gentle slope (bunny slope / magic carpet area) and do this:
- Strap in on flat ground
- Stand up and feel your weight centered between your feet
- Slightly bend your knees — not a deep squat, just unlocked
- Keep your back straight, hips over your board
- Look where you want to go, not at your board
What to feel: The board’s edges on either side. Your heel edge (the side behind your heels) and your toe edge (the side your toes point toward) are your two main controls. Everything in snowboarding is about applying pressure to one of these two edges.
Step 3: Learn to Skate (Push with One Foot)
On flat ground and at the lift, you’ll need to push yourself along with one foot unstrapped — this is called skating.
- Unstrap your back foot
- Place your unstrapped foot on the board between your bindings (or on the stomp pad)
- Use your unstrapped foot to push like a skateboard
This feels awkward for five minutes and then becomes natural. Practice it going to and from the lift.
Step 4: Learn to Fall Correctly
Yes, you’re going to fall. Here’s how to fall without hurting yourself:
The golden rule: Never stick your hands out straight to catch yourself. This is how wrists break. Instead:
- Fall forward (toe-side): Curl your hands into fists and take the impact on your forearms and knees. Drop your chin to your chest.
- Fall backward (heel-side): Arms cross over your chest or belly. Land on your butt/lower back, not your tailbone.
Wear wrist guards. This is the single piece of protective gear that makes the most difference for beginners. Beginner-level wrist fractures from instinctive hand-planting are completely preventable.
Getting back up:
– From your back: Roll to your heel edge, plant hands behind hips, push up
– From your front: Push up from your knees, use your toe edge for leverage
Step 5: Traverse and the Falling Leaf (Your First Real Movement)
Traversing means riding across the slope rather than straight down. This is the foundation of speed control.
Heel-Edge Traverse
With your board across the slope (perpendicular to the fall line):
1. Dig your heel edge into the snow — press your heels down
2. Slowly let yourself slide sideways across the slope
3. Lean slightly back toward the uphill side to maintain control
4. Keep your knees slightly bent
You should slide slowly and controllably from one side of the slope to the other.
Toe-Edge Traverse
Now rotate to face the slope and repeat on your toe edge:
1. Tuck your toes up (flex your ankles, dig your toe edge in)
2. Slide sideways across the slope in the other direction
The Falling Leaf: Once you can traverse on both edges, string them together. Go across on your heel edge, slowly shift weight, go back the other way on your heel edge. You’ll trace a zigzag pattern down the mountain — like a leaf falling from a tree. This is your first “run.”
Once you’ve mastered the falling leaf on your heel edge, do the same on your toe edge.
Step 6: How to Stop on a Snowboard
Stopping comes before turning. If you can’t stop, you can’t progress safely.
The Heel-Edge Stop
- Begin a heel-edge traverse across the slope
- Shift your weight back slightly
- Flex your ankles — press your heels down into the snow harder
- Feel the edge bite and dig in
- Apply more pressure until you come to a complete stop
It should feel like you’re scraping the snow with your heels. The board carves into the snow and friction slows you down.
The Toe-Edge Stop
Same concept, opposite edge:
1. Traverse on your toe edge
2. Dig your toes down (flex ankles the other way)
3. Lean forward slightly into the hill
4. Apply more toe-edge pressure until stopped
Common mistake: Leaning backward when you want to stop. Counterintuitively, leaning back actually makes you go faster on your heel edge. To stop, you need to increase edge pressure — press down and forward into the edge.
Step 7: How to Link Turns
Linking turns is what separates a first-day beginner from someone who can actually ride. Here’s the mental model:
A turn happens when you shift your weight from one edge to the other while moving downhill.
The J-Turn (Beginner Turn)
- Start traversing on your heel edge
- Slowly point the nose of your board slightly downhill (unweight your edge briefly)
- Let the board gain a little speed
- Shift your weight to your toe edge to complete the turn and slow back down
The path looks like a “J” — you slide downhill, curve across. Do this repeatedly on one side until it’s automatic.
Then practice the reverse: start traversing on your toe edge, point the nose downhill, shift to heel edge.
Linking (C-Turns)
Once both J-turns feel natural, link them:
1. Complete a toe-edge J-turn
2. At the end of the curve, instead of stopping, transition directly to a heel-edge J-turn
3. And back again
You’re now carving S-curves down the mountain. This is snowboarding.
Stay in alignment: Your upper body should face the same direction as your lower body. A common mistake called counter-rotation happens when your upper body twists against your lower body to initiate turns — it looks like swinging your arms across your body. Keep shoulders parallel to your hips.
Step 8: How to Ride the Chairlift on a Snowboard


The chairlift is the number-one fear of beginner snowboarders. And for good reason — the loading and unloading takes a tiny bit of coordination you haven’t practiced yet. Here’s exactly what to do.
Loading the Lift
- Approach the lift line with your front foot strapped in, back foot free
- Skate (push with your back foot) to the loading point
- When it’s your turn, stand at the load line and wait for the chair to come around behind you
- Sit down as it scoops you up — don’t jump toward it
- Rest your board on the footrest if there is one, or point the nose up slightly so the board doesn’t drag
- Lower the safety bar
Do chairlifts slow down? No — most high-speed chairlifts maintain speed throughout. The loading zone just looks slow because you’re standing still and the chair catches up to you from behind.
Unloading the Lift
This is the scary part. Here’s how to not fall:
- Raise the safety bar about 30 seconds before the unload ramp
- Move to the edge of your seat
- As the chair reaches the unload ramp, slide off and let gravity take you down
- Keep your back foot flat on the board beside your back binding (or on the stomp pad)
- Let your board carry you straight down the ramp without turning
- Once you’re clear of the ramp, move to the side before you stop
What goes wrong: People try to turn or brake immediately at the ramp exit. Don’t. Keep going straight for 10-15 feet, then stop to one side.
Step 9: What to Wear Snowboarding as a Beginner
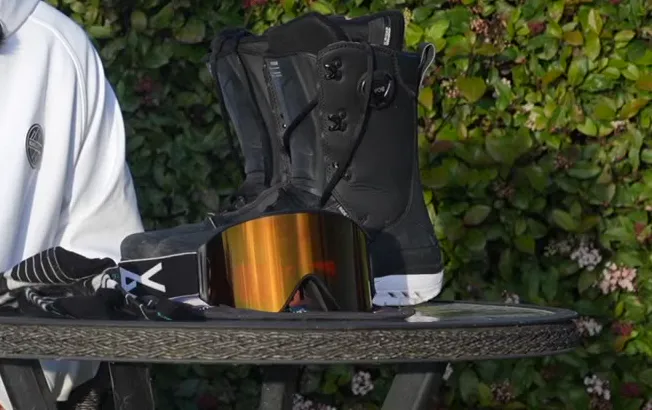
Getting cold or wet ends your day early. Here’s what actually matters:
Essential layers:
– Base layer (top + bottom): Moisture-wicking synthetic or merino wool. No cotton — it stays wet and makes you hypothermic.
– Mid layer: Fleece or insulated jacket
– Outer layer (shell or insulated jacket + pants): Waterproof, breathable. Look for at least 10,000mm waterproofing rating.
Must-have gear:
– Helmet (non-negotiable — most rental shops require or offer them)
– Wrist guards (under your gloves)
– Thick waterproof gloves or mittens
– Goggles (not sunglasses — goggle lenses are impact-rated and anti-fog)
– Warm waterproof socks (snowboard-specific socks are longer and padded in the right spots)
Rental vs. buy:
For your first day, rent everything. If you go 3+ times, buy boots first (they fit your feet uniquely). Board and bindings can be rented longer.
Should You Take a Snowboard Lesson?
Yes. Here’s why, even if you hate the idea:
A 2-hour group lesson accelerates your progress by the equivalent of 2 full days of self-teaching. Instructors see exactly what you’re doing wrong (usually alignment and edge pressure) and correct it on the spot, before it becomes a bad habit.
Lessons from a PSIA-AASI certified instructor are the US standard. Most resorts offer them and many beginners bundle lessons with lift tickets and rentals for a meaningful discount.
What you’ll learn in a first lesson:
– Stance and balance drills
– Falling safely
– Edge control (the core skill)
– Basic stopping
– Traversing and early turns
How many lessons? Most people who are reasonably fit and athletic can link basic turns after 2-3 lessons or about 3-5 days of riding. Plan for the first day to be humbling — that’s normal.
Common Beginner Snowboard Mistakes (And How to Fix Them)
1. Looking down at the board
Your board goes where your eyes go. Look ahead, at where you want to be.
2. Leaning back
Beginner instinct is to lean away from the slope, which actually puts you in the worst position for control. Keep your weight centered over the board.
3. Stiff upper body
Arms out to the sides like a tightrope walker doesn’t help. Keep arms relaxed and slightly in front of your body.
4. Going too fast too soon
Stick to the beginner slope until stopping and traversing are automatic. Speed is the enemy of learning the fundamentals.
5. Skipping the lesson
You think you’ll figure it out. You won’t — at least not as fast as you would with instruction. See the lesson section above.
6. Counter-rotation
Twisting your upper body against your lower body to initiate turns creates bad habits that are hard to unlearn. Keep upper and lower body aligned.
Is Snowboarding Hard to Learn?
Honestly? The first day is one of the hardest days you’ll ever have on a mountain. The second day is dramatically better. By day 3-4, most beginners are linking turns and actually having fun.
Compare this to skiing: skiing is easier to learn in days 1-2 but has a longer plateau before you can ride most terrain. Snowboarding has a steeper initial curve and a much faster progression once you get past day 2-3.
If you skateboard, surf, or wakeboard: Your edge sense and balance translate. You’ll learn faster than average — probably linking turns by the end of day one.
If you’ve never done any board sport: Expect 2-3 days before linking turns. Don’t judge your progress on day one.
Is 25 (or 35, or 45) too old to learn? No. Adults learn differently than children — they’re more cautious but also more aware of body mechanics. Plenty of people learn at 30, 40, even later. You will be sore. Stretch.
Frequently Asked Questions (FAQ)
Q: How long does it take to learn to snowboard?
A: Most beginners can link basic turns after 2-5 days of riding. Getting comfortable on blue runs takes most people about 5-10 days total. That said, “learning to snowboard” is a continuous journey — most riders improve for years.
Q: Is snowboarding harder than skiing for beginners?
A: Days 1-3 are harder on a snowboard — falling more, less intuitive edge control. After that, snowboarding tends to progress faster. Which you’ll enjoy more is personal preference.
Q: Can I teach myself to snowboard without lessons?
A: Technically yes. Practically, you’ll develop bad habits that are hard to undo and you’ll take longer to learn. One 2-hour lesson pays for itself in days of saved frustration.
Q: What snowboard size should a beginner use?
A: Use the shorter end of your height/weight range (see the size chart above). Shorter boards are more maneuverable and easier to control while you’re learning edge pressure.
Q: How do I know if I’m regular or goofy?
A: The push test (which foot you put out when shoved from behind) or slide test (which foot leads when you slide in socks) are the most reliable methods. If you already skateboard or surf, your stance usually matches.
Q: How do you stop on a snowboard without falling?
A: Press your heel edge into the snow while traversing (heels down, knees slightly bent) and gradually increase pressure until you stop. Practice on a very gentle slope before trying on steeper terrain. Do not lean backward — lean into the edge.
Q: Should I wax my snowboard as a beginner?
A: If renting, no — rental boards are maintained by the shop. If you buy a board, wax it every 4-6 days of riding. A dry board is slower and harder to control. Most shops offer waxing service for $15-25.
Q: What’s the best terrain for beginner snowboarders?
A: Green runs (beginner trails) marked with green circles. The bunny slope with a magic carpet lift (no chairlift needed) is ideal for your first hour. Don’t let anyone drag you onto blue runs until you can consistently link turns and stop on demand.
Q: How do I get on and off a chairlift on a snowboard?
A: Load with front foot strapped in, back foot free. Slide onto the seat as it comes around. To unload: raise the safety bar early, slide off when the ramp begins, glide straight down the ramp (don’t turn immediately), then move to the side. Full steps in the chairlift section above.
Q: Is 25 too old to learn to snowboard?
A: Not even close. 25 is young. People learn at 40, 50, and beyond. Adults are more deliberate learners which actually helps — you won’t throw yourself down black runs recklessly.
Q: How many snowboarding lessons do beginners need?
A: At minimum, one lesson on day one. Two or three lessons across your first 2-3 days accelerates progress dramatically. After that, practice on your own with occasional refresher lessons when you hit a plateau.
Q: What should a first-time snowboarder wear?
A: Waterproof outer layer (jacket + pants), moisture-wicking base layers (no cotton), warm waterproof gloves/mittens, goggles, a helmet, and snowboard-specific socks. Wrist guards are strongly recommended.
Quick-Reference: Your First-Day Checklist
- Confirm snowboard size matches your weight (see chart above)
- Check board width fits your boot size (toe/heel drag check)
- Know your stance (regular or goofy)
- Book a beginner lesson if you haven’t
- Pack: helmet, goggles, wrist guards, waterproof layers, warm socks
- Arrive early — gear fitting takes time
- Start on the magic carpet / bunny slope, not the chairlift
- Practice falling and getting up before going anywhere
- Master heel-edge stop before anything else
- Celebrate every small win — this sport is genuinely hard at first


